After starting my journey of creating an iOS app utilizing SwiftUI, I was looking around for a suitable CI/CD solution to automatically handle test, beta and release uploads. Testing out multiple solutions I came across Bitrise and was intrigued right from the beginning - I found the perfect tool for my needs. (BTW: Bitbot is one of the mascots of Bitrise)
This blog post will highlight how I configured and use Bitrise to automate as much as possible in terms of CI/CD for my iOS apps.
What's this all about ?
Before diving right into the tutorial part of this post, I want to quickly explain the idea behind the terms, Continuos Integration and Continuos Delivery.
Continuos Integration
When working with multiple developers on the same project, it's most common to use some versioning system, like Git, where all developers commit their code. Before the code finds it way into the codebase, a developer makes a Pull Request - so to say requesting the permission that the code, which was written by developer, is merged. Before this can be done, all tests must be run, securing that the code does not break existing tests. All of those tests can run on a shared computer, fully automated. When the tests succeed, developers are notified and start reviewing the Pull Request. This process of automating tests and integration of new code into the existing codebase is called Continuos Integration.
Continuos Deployment
After all tests have succeeded, all Pull Requests being reviewed your software is ready to be shipped. The process of packaging, preparing and uploading your final piece of software, automatically from your versioning repository, is called Continuos Deployment.
Bitrise
After learning the basic concepts, let us have a look at Bitrise. It is a cloud platform for the CI/CD pipeline, explicitly designed for mobile applications. Be it native applications or cross platform projects with Xamarin or React Native, Bitrise gives us the opportunity to set up CI/CD pipelines to our needs.
In the following I want to give you an introduction of how to set up your app on Bitrise and how I use it in my setup.
The foundations
Before I will go on, I want to highlight how my project is structured. I am using Git as a versioning system - I guess everyone is doing so nowadays. My workflow is based on a slightly modified version of the Git Flow Model.
I have three main branches:
- master - For public releases
- develop - Ongoing development
- stage - Publishing beta releases
Additionally I have:
- feature/* - For developing features
- deleted and merged to develop after a feature is finished
- hotfix/* - For hotfixes after an public release
- deleted and merged to master and develop
Inside the actual Xcode project the structure of the main branches is mapped to schemes. I have one scheme for each of these branches with corresponding configurations where I use different variables like Bundle Identifers, App Icons, Server URLS etc. .
Get started on Bitrise
Now let's get our hands dirty. The first thing that is necessary to get started on Bitrise is to create a new app. You can either specify it to be private, or public. In this tutorial let us go with private at first. I have connected my GitHub account with Bitrise, which makes it easier to select the repository which contains your code. But it's also possible to manually paste the URL of your git repository.

It's necessary to give Bitrise access to your repository. This can be either done automatically or you need to add the SSH keys by our own. I would definitely recommend the automatic setup, if possible.
The next step is to select the branch that includes our your project file. If you set up your project this will most probably the master or develop branch. Bitrise will try to verify your configuration and hopefully do not find any errors. Even if errors occur here, most of them can be safely ignored - for example not finding an app icon, since we just got started with the setup and fix everything afterwards.
The last step is to let Bitrise set up WebHooks which will allow us to trigger build based on pushes to our repository - very useful !
The first build will start automatically after the setup is finished, but be aware most probably this will fail. But no worries, that's fine.
Get to know the user interface
Now it's time familiarize ourself with the dashboard and general user interface of Bitrise.
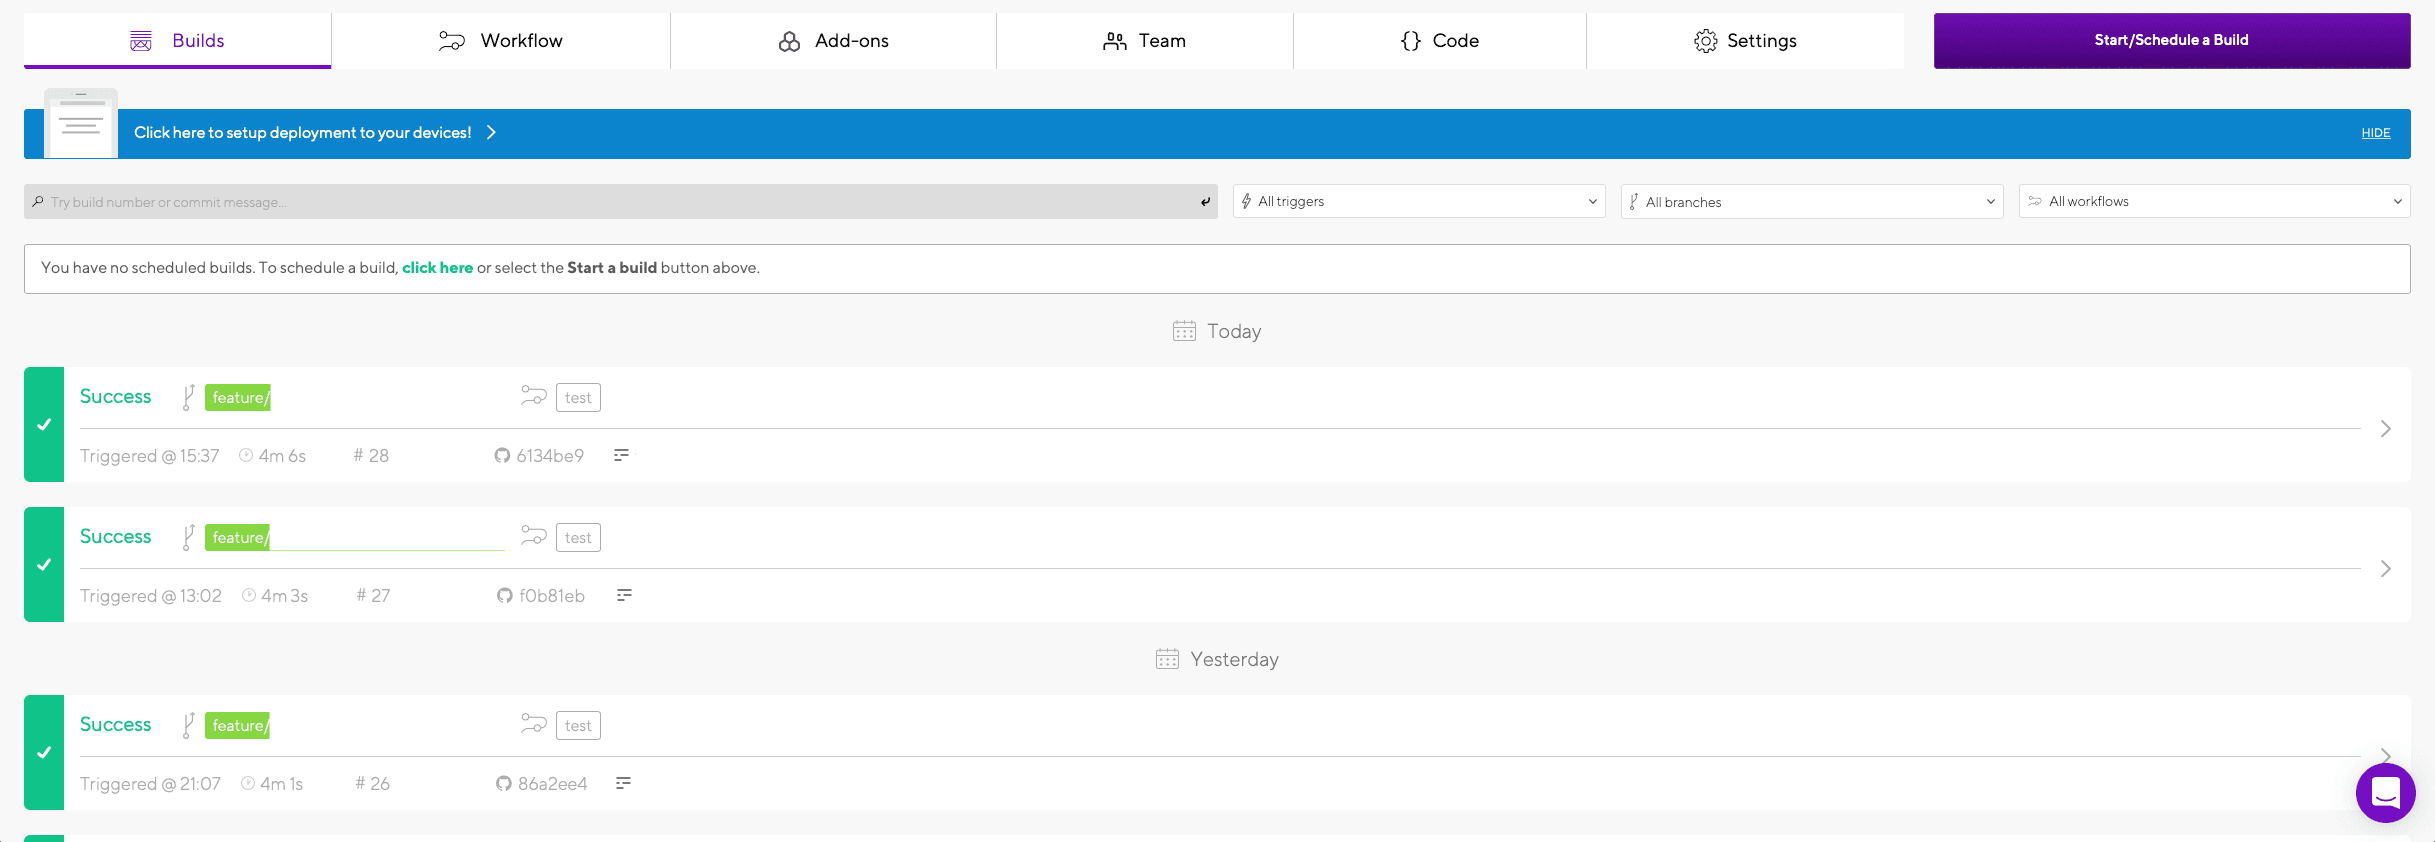
Dashboard
The dashboard provides an overview about all past builds, what branch they used to build and what Workflow (we come to this term in a minute) they have used. At the top you have different tabs redirecting you to important parts of your app. I will not go into detail of all of those, but will only have a look at the Workflows tab here.
Workflow
Heading over to the workflow tab. Workflows are groups of actions that will run during one build. If you already now Fastlane, you will feel at home.
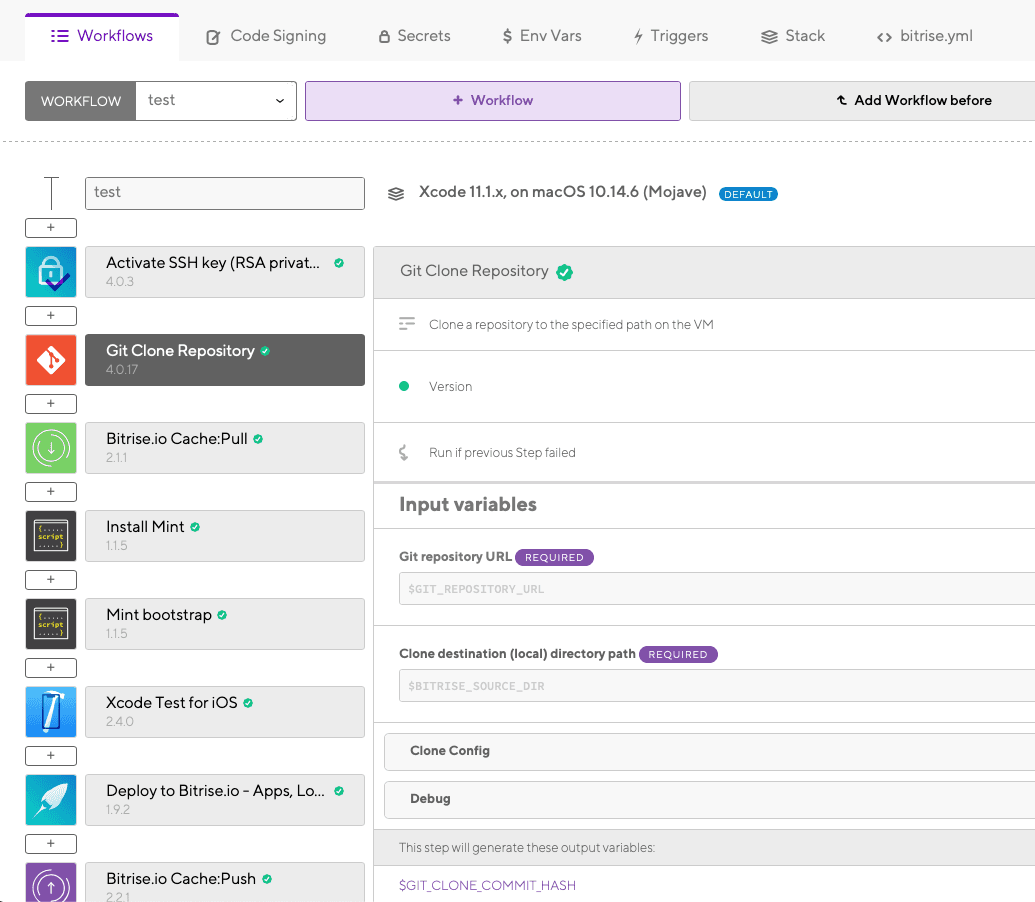
You can have multiple workflows for different scenarios. For example one testing workflow where only tests are run, one beta release workflow where you will run tests, code signing and uploading to TestFlight and one for official releases. That is exactly what I have in my setup. You basically can do whatever you want in these flows and Bitrise has a ton of actions to select from. You can even run shell scripts as actions, which grants you an additional powerful way to customize your build steps.
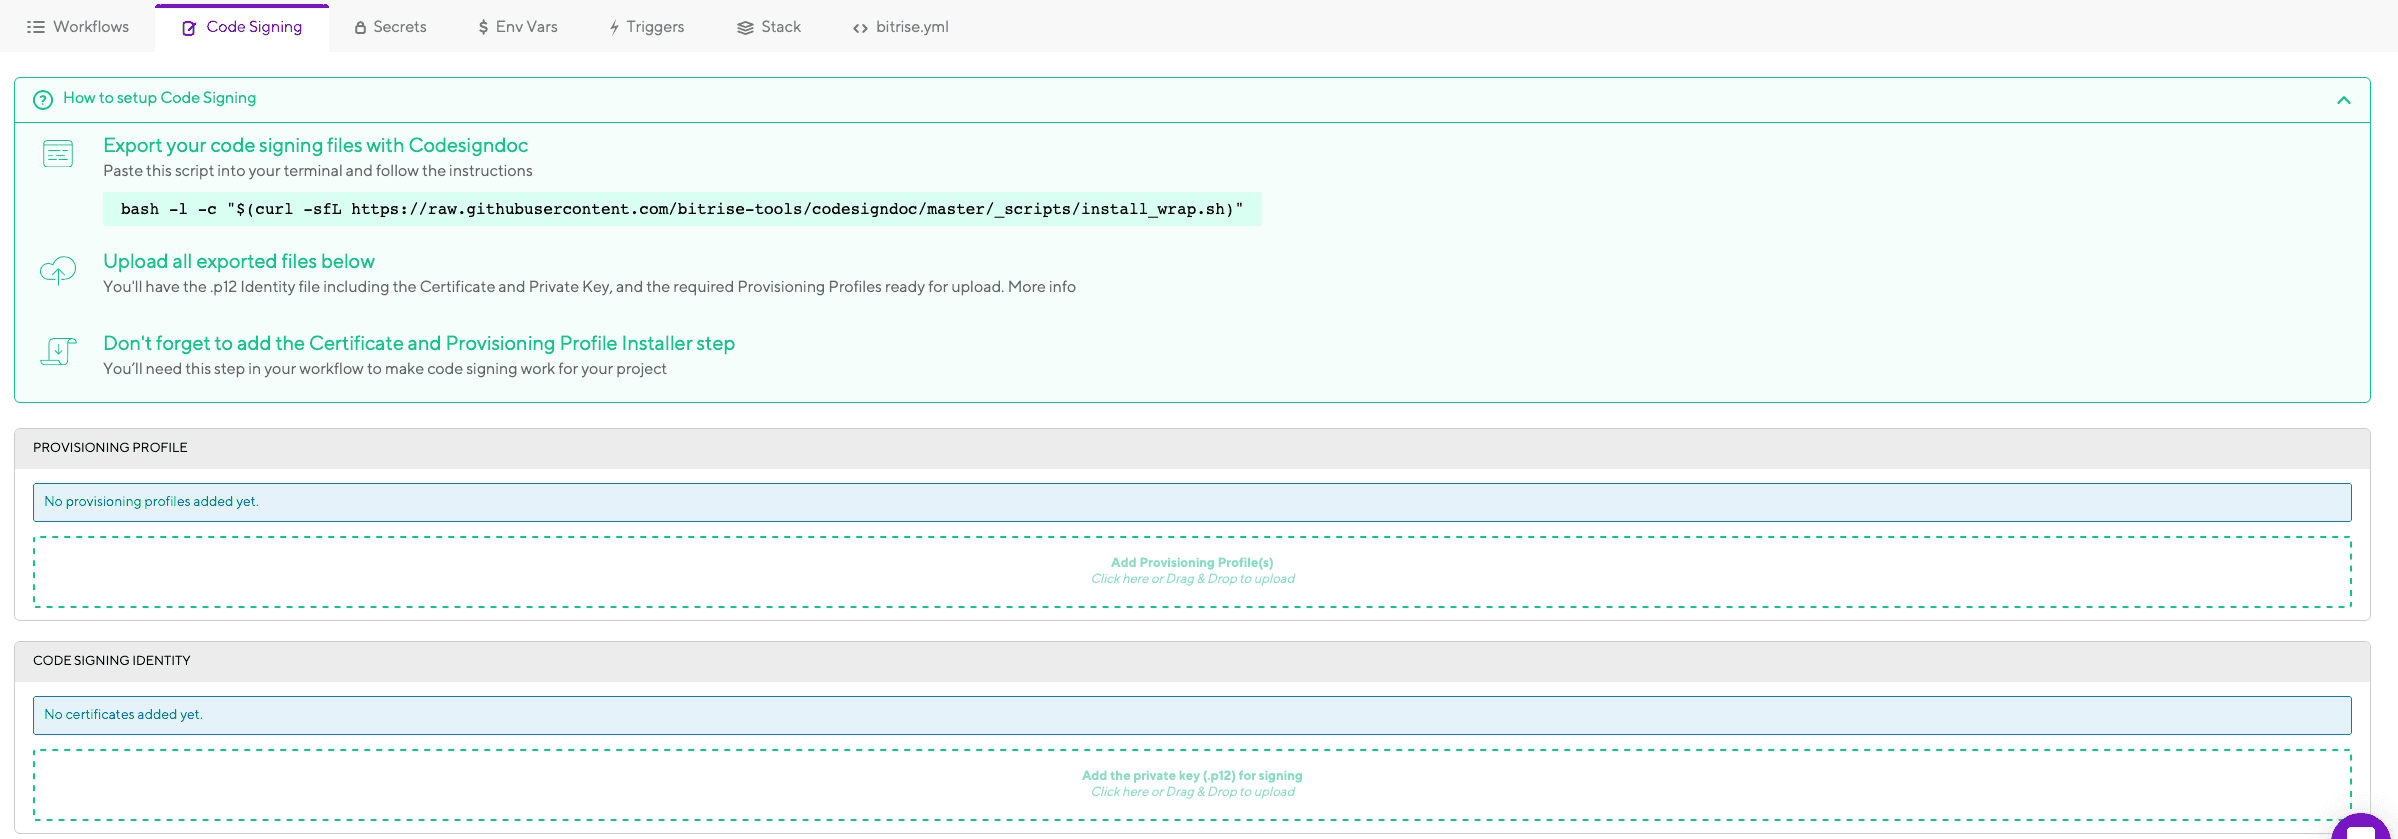
Code Signing
Inside the Code Signing tab you can configure your provision profiles and certificates that will be necessary to sign your iOS applications. You can even use a command line tool to help you to set this up.
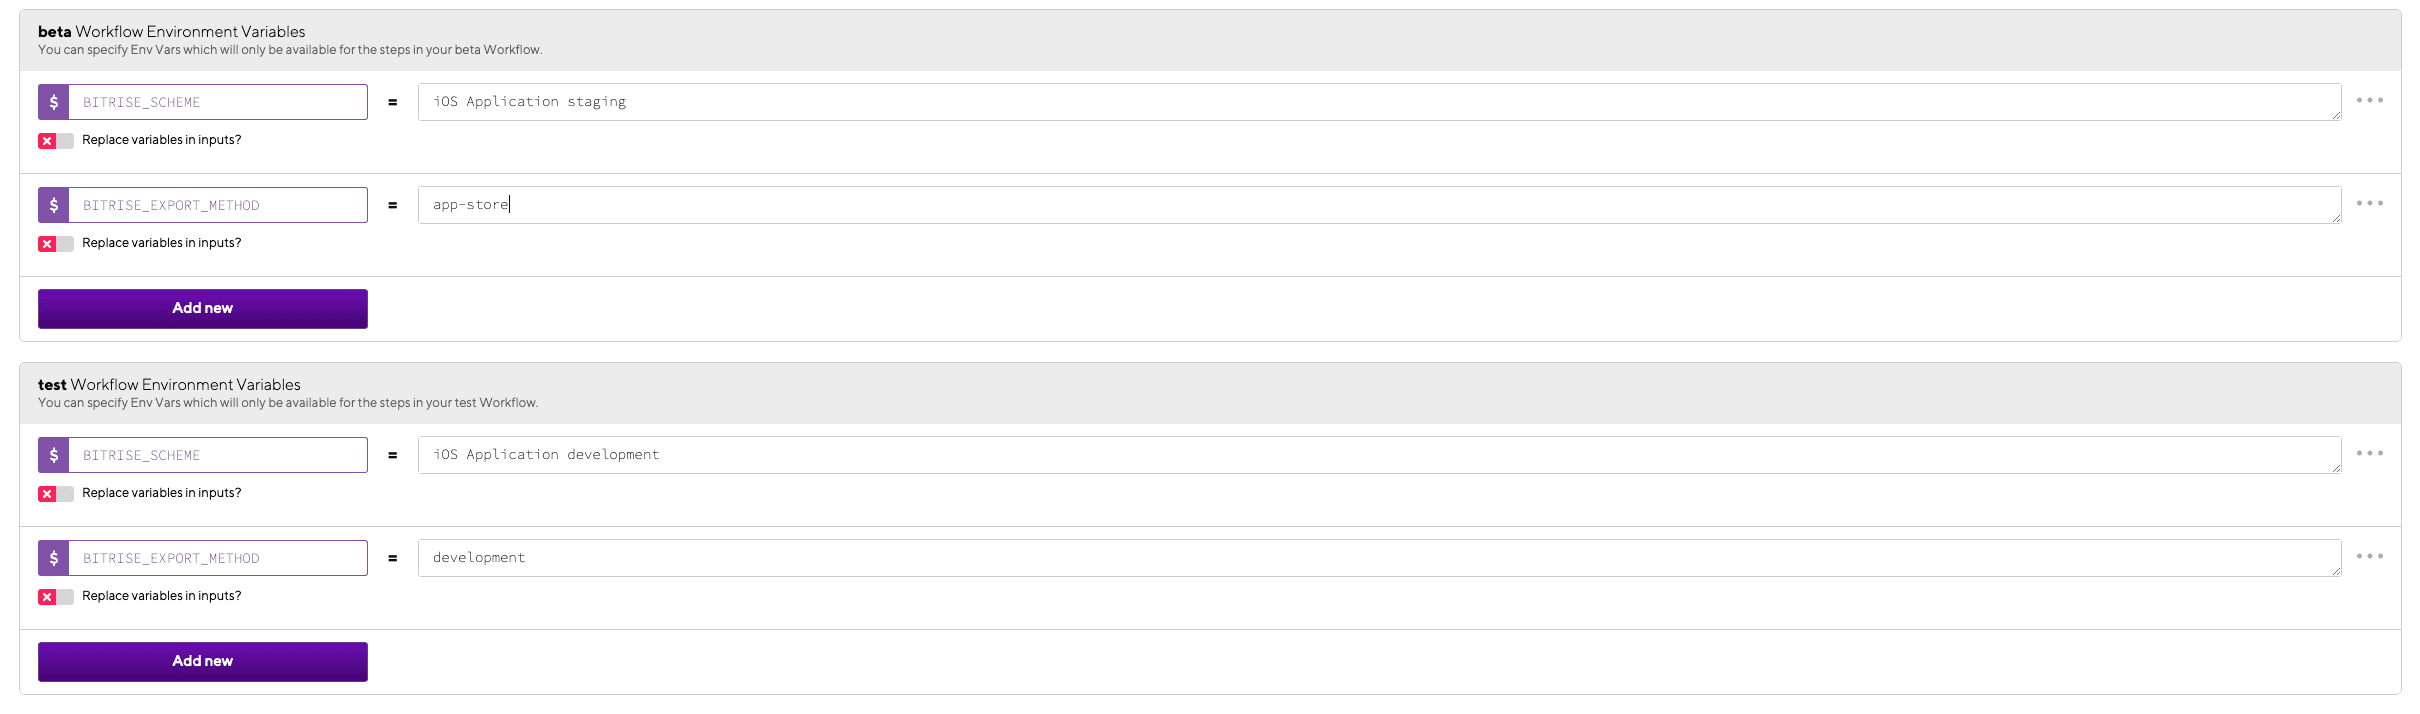
Environment Variables
Looking at the top bar again we can find he Env Vars tab. Here it's possible to define different environment variables for different workflows. In my case I used it to specify the scheme that is used to build the application.
Triggers
In combination with environment variables, we can specify different Triggers to specify which Workflow should be run when we do something in our repository. For example I specified my test workflow to be run if code is pushed to
- develop branch
- any feature branch

- or a Pull Request is opened from any feature branch to develop

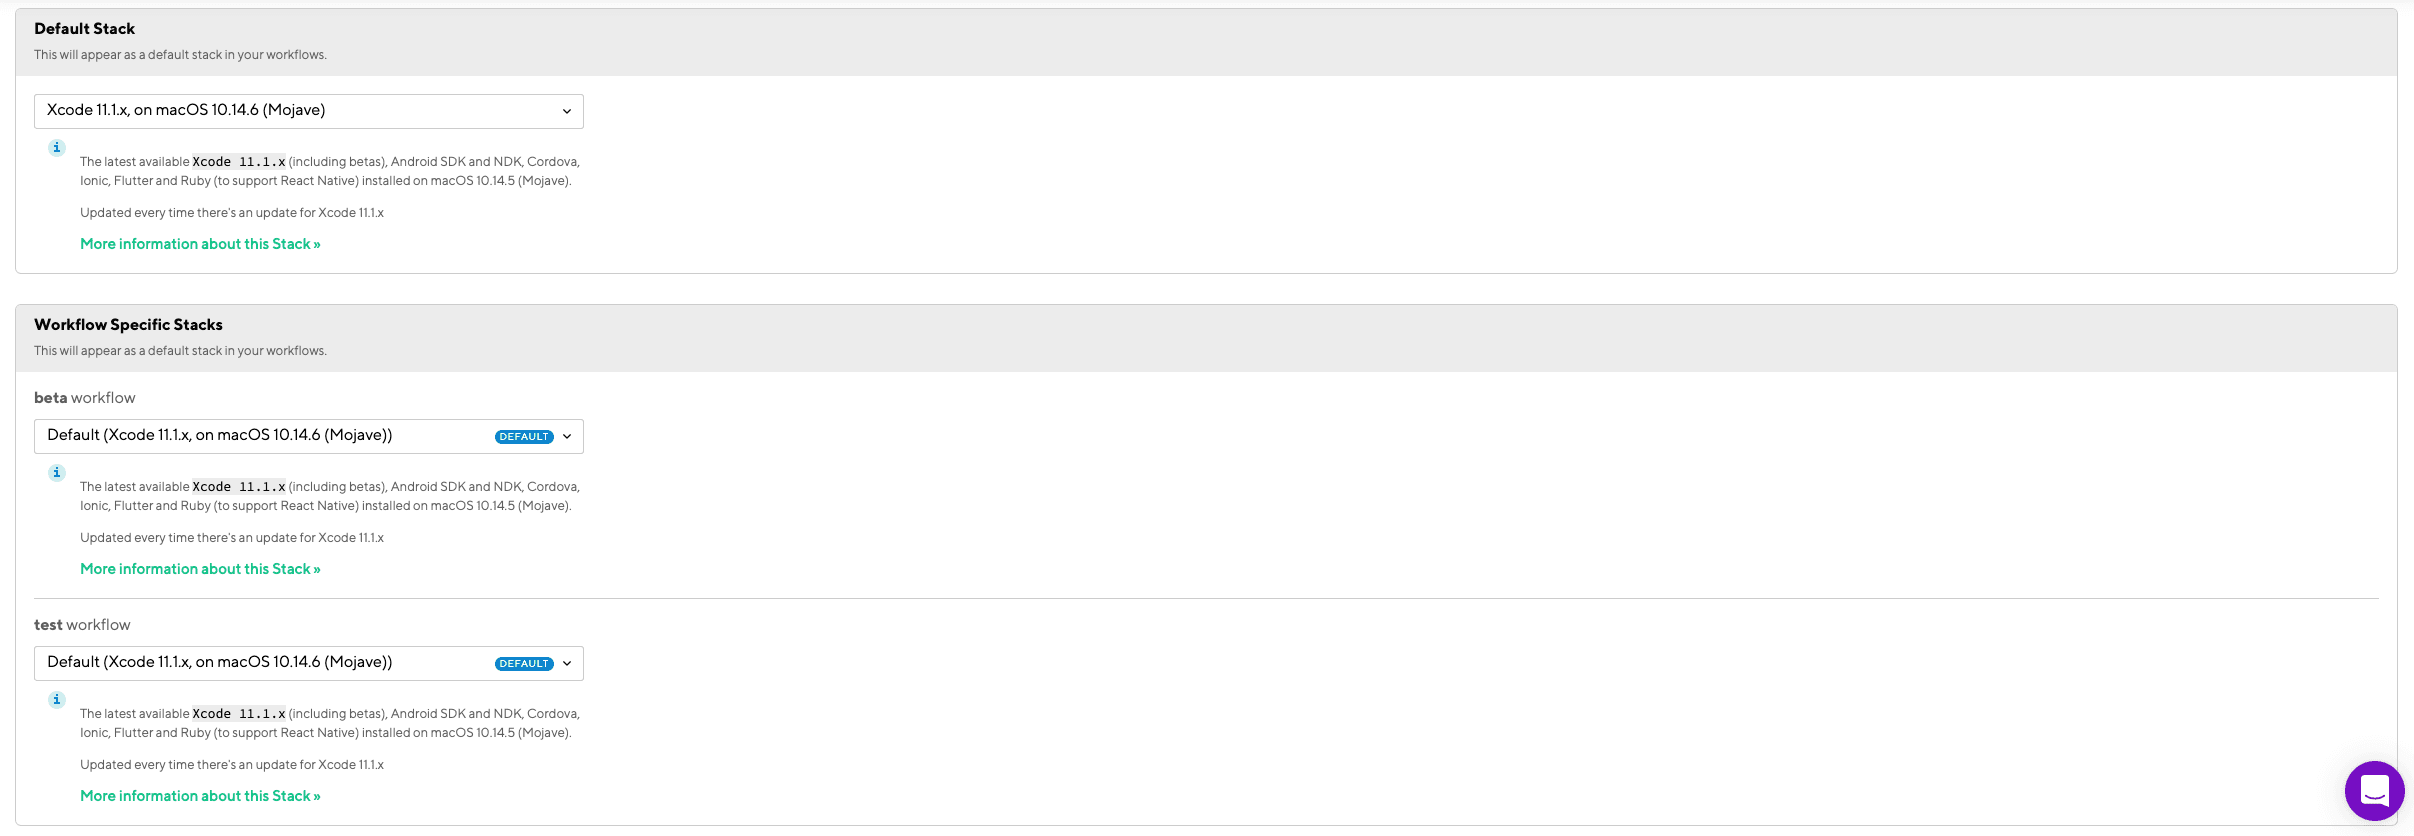
Stack
Inside the Stack tab you can specify the build environment of your different workflows. For example it would be possible to create a dedicated workflow for testing out builds on beta releases of Xcode.
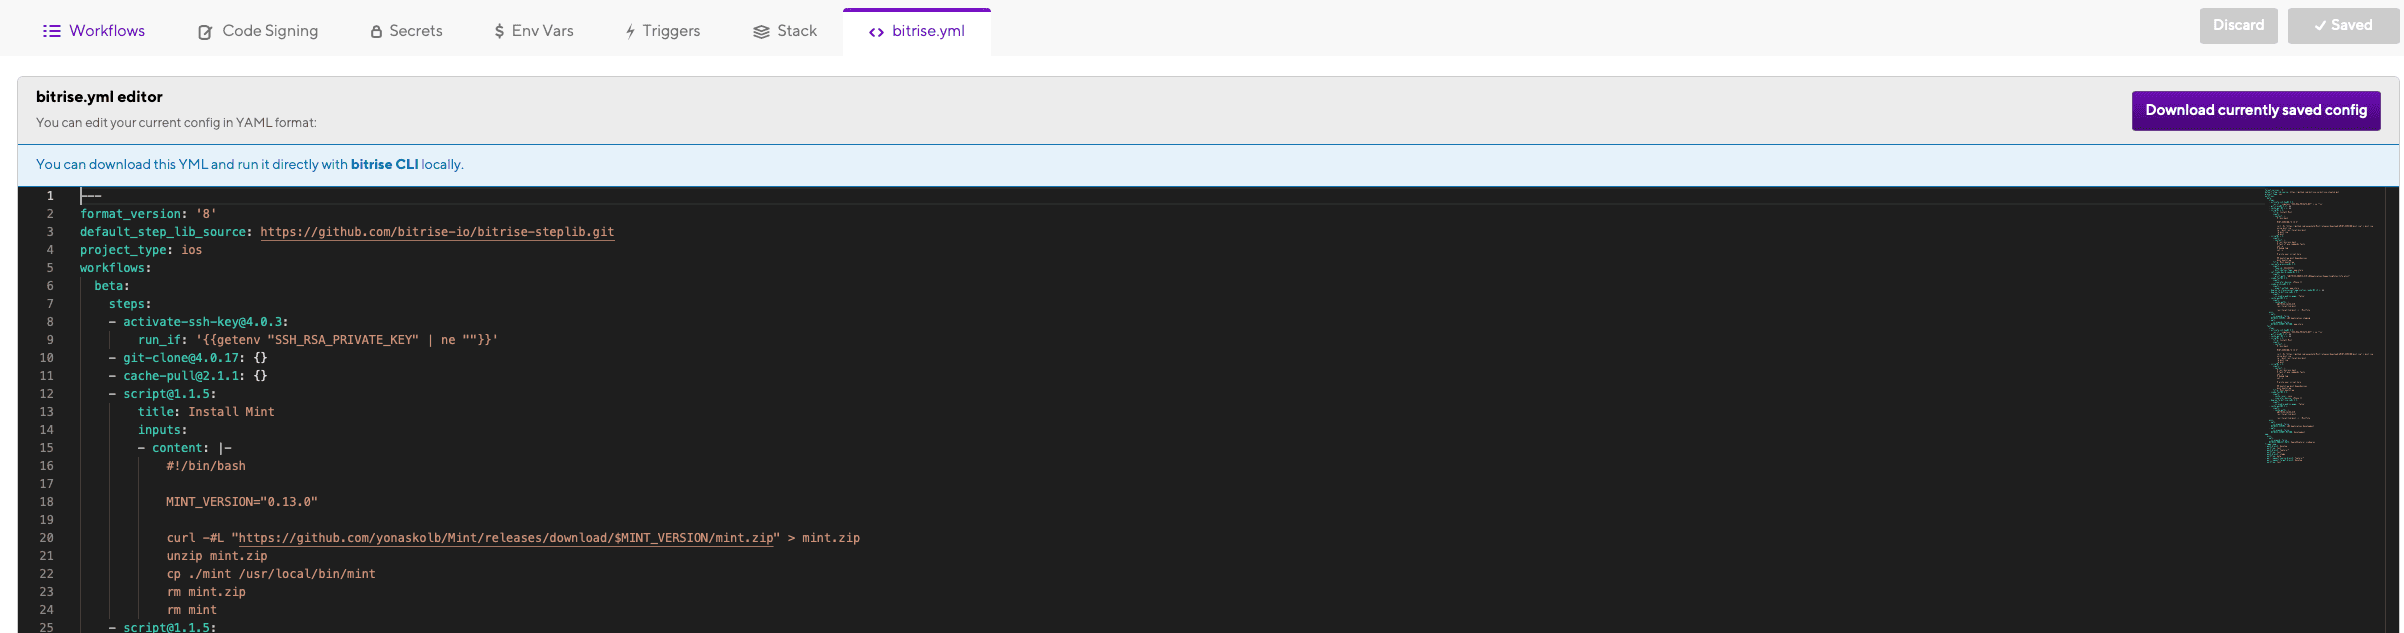
bitrise.yml
Last but not least we have the bitrise.yml tab. Here you can find a configuration file of everything that you have configured. You can download it, put it into your project and let the build workflows run locally on your machine with the help the Bitrise CLI - how nice is that ?! You can test out your whole workflow locally and experiment with it.
Conclusion
That was a lot of text and input. Let us recap a little bit. With Bitrise you have a great tool at hand, that will help you automate all the pain points developers usually have. You can automate tests, integration of new code into the codebase, code signing, uploads and many more. You can define different workflows, containing different actions, run based on certain triggers. Those workflows can easily be integrated into your existing project setup, for example by running workflows for your different schemes.
I hope that this post was helpful to get you started with Bitrise and showed an example on how you can configure your app.
My setup
Here is a small recap of my setup:
3 workflows:
test
- Build application and run tests to ensure code does not break
- Triggered by:
- Pushes to develop, feature/* branches
- Pull Requests from feature/* branches to develop
beta
- Build application, run tests, increment build numbers, tag build, and upload app to TestFlight.
- Triggered by:
- Pushes to stage branch
release
- Build application, run tests, increment build numbers, tag release, and upload app to AppStore.
- Triggered by:
- Pushing to master branch