Up until recently I never touched watchOS development. But just some months ago it became a topic for me and therefore I dived into developing a watchOS 9 app. In the course of this investigations I needed to find a way to modify the push notifications view on the watch. In this small article I want to highlight how you can enhance the appearance of notifications of your watchOS application.
Short-Look Interface vs Long Look Interface
Before starting I want to clarify some wordings here. Apple defines two interfaces for notifications: "Short-Look Interface" and "Long-Look Interface".
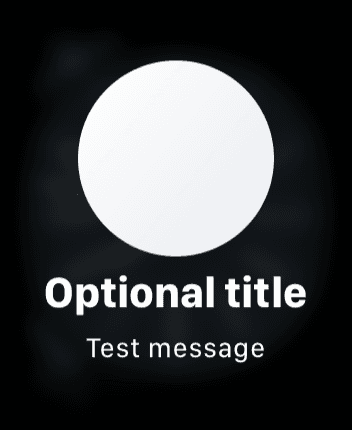
The Short-Look interface is displayed when a notification is received on the watch and the user raises its wrist to take a look. Its an abbreviated version of the notification, showing the app icon, the title of the notification if present (app name if the title is not present) and some parts of the notification body. It is auto generated by the system and cannot be interacted with.
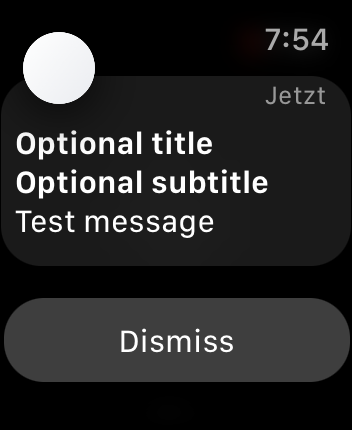
If the user keeps their wrist up, the view transitions to the Long-Look interface. This view features a system provided sash, an app content section and app defined actions. Per default this view is also generated by the system, but in contrast to the short look interface, this view can be modified by developers to offer a richer notification experience. And this is what we are going to implement today.
Setup - Prepare Notification Reception
In this post I assume a very bare minimum watchOS 9 application, with a single target (no extension target any longer) build with SwiftUI. It could look something like the following:
import SwiftUI
import WatchKit

@main
struct WatchOSApp: App {

    var body: some Scene {
        WindowGroup {
            ContentView()
        }
    }
}
The first thing we are going to do is to prepare the watch app to request notifications from the user. To accomplish this we need to add an @WKApplicationDelegateAdaptor to the App. This will be our delegate for app lifecycle events.
@main
struct WatchOSApp: App {
	@WKApplicationDelegateAdaptor var appDelegate: WatchOSAppDelegate

    ...
}
Within this delegate we can now request user permission when the app has finished launching. This will prompt the user the first time opening the app to allow notifications. Keep in mind that once the user has been asked the prompt is never shown again. To change the permissions then the user has to go the settings of the app to allow or decline notification.
import UserNotifications
import os

class WatchOSAppDelegate: NSObject, WKApplicationDelegate, UNUserNotificationCenterDelegate {

	func applicationDidFinishLaunching() {
		UNUserNotificationCenter.current().requestAuthorization(options: [.alert, .sound, .badge]) { (allowed, error) in
			 // This closure will not trigger on the main loop
			if allowed {
			  os_log(.debug, "Notifications Allowed")
			} else {
			  os_log(.debug, "Notifications are not allowed")
			}
		}

		let center = UNUserNotificationCenter.current()
		center.delegate = self
	}
}
In order to display notifications while the app is in foreground, and not only when the app is in the background, its necessary to additionally implement didReceiveRemoteNotification(_:) and userNotificationCenter(_:willPresent:) from UNUserNotificationCenterDelegate. For the sake of simplicity, a bare minimum implementation should suffice for now.
class WatchOSAppDelegate: NSObject, WKApplicationDelegate, UNUserNotificationCenterDelegate {

	func didReceiveRemoteNotification(_ userInfo: [AnyHashable : Any]) async -> WKBackgroundFetchResult {
		return .noData
	}

	func userNotificationCenter(_ center: UNUserNotificationCenter, willPresent notification: UNNotification) async -> UNNotificationPresentationOptions {
		return [.badge, .banner, .list]
	}
}
Thats it for the setup of notification reception on watchOS 9. Now we can finally start modifying the long look interface.
Modifying Long-Look Interface
The first thing that needs to be added to the App struct is a WKNotificationScene. It takes an WKUserNotificationHostingController type as parameter, which is later responsible for displaying our custom view into the long look notification view. This type is very similar to the UIHostingViewController which bridges between UIKit and SwiftUI. Additionally it also takes a category string which is used to match the apns category payload.
@main
struct WatchOSApp: App {
	@WKApplicationDelegateAdaptor var appDelegate: WatchOSAppDelegate

    WKNotificationScene(controller: NotificationController.self, category: "notification_category")
}
WKUserNotificationHostingController Implementation
The WKUserNotificationHostingController is the first level of modifications which can be applied to the long look interface. It comes with several properties we can change in order to modify the notification view. One of the most interesting ones is the isInteractive property. It determines whether the user can interact with your custom view. This means you can place Toggles, Buttons or any other interactive element on the custom view and the user can actually toggle them if isInteractive is set to true. But be cautious with this. Apple recommends to not over complicate interactive notification views. For this post we will create an interactive notification, therefore we override the property and set it to true.
final class NotificationController: WKUserNotificationHostingController<NotificationView> {

	// Interactive notification
	override class var isInteractive: Bool {
		return true
	}
}
Next up we will save the actual notification content and the reception date by overriding the didReceive(_ notification:) method.
final class NotificationController: WKUserNotificationHostingController<NotificationView> {

	var content: UNNotificationContent!
	var date: Date!

	...

	override func didReceive(_ notification: UNNotification) {
		content = notification.request.content
		date = notification.date
	}
}
The last thing to add is the actual View that is going to be displayed. This is accomplished by overriding the body property
final class NotificationController: WKUserNotificationHostingController<NotificationView> {

	var content: UNNotificationContent!
	var date: Date!

	...

	override var body: NotificationView {
		return NotificationView(content: content, date: date)
	}
}
Optional: Sash Customization
In addition, WKUserNotificationHostingController also offers properties to override the appearance of the sash view at the very top of the long look interface. The following properties can be overridden and used to make the sash appear in the way you want, here with some sample values.
⚠️ There seems to be some issues with these properties and they do to not work correctly on watchOS 9: https://developer.apple.com/forums/thread/713204
override class var sashColor: Color? {
	return .red
}

override class var wantsSashBlur: Bool {
	return true
}

override class var titleColor: Color? {
	return .primary
}

override class var subtitleColor: Color? {
	return .secondary
}
Optional: Custom Actions
Sometimes we also want to attach custom actions to the long look interface. To do so WKUserNotificationHostingController offers the notificationActions property which we can override when a notification is received. This allows to dynamically set custom actions to the notification view. You can also add "static" actions. For follow up you can read more about this approach on the official documentation: https://developer.apple.com/documentation/watchos-apps/adding-actions-to-notifications-on-watchos
override func didReceive(_ notification: UNNotification) {
	...
	self.notificationActions = [.init(identifier: "action_identifier", title: "Dynamic action title")]
}
This finalizes our notification controller implementation.
Custom Notification View Implementation
With all of the code above in place, we can now create our custom notification view. For this post we assume we receive a notification which contains a movie that has been added to a watch list. We include a Toggle that gives the user the option to display a detailed description of the movie that has been added. This should also demonstrate the interactive behavior we enabled previously.
The following code sample shows the custom view. Please keep an eye on the userInfo parsing of the notification. In an real world application we should avoid force unwrapping. This was only done for the sake of simplicity in this post 😉
struct NotificationView: View {

	// MARK: - State Properties
	@State private var showMore = false

	// MARK: - Private Properties
	private let content: UNNotificationContent
	private let date: Date

	// MARK: - Initializers
	init(content: UNNotificationContent, date: Date) {
		self.content = content
		self.date = date
	}

	var body: some View {
		VStack(alignment: .leading) {
			Text(content.title)
				.font(.headline)
			Text(content.subtitle)

			if showMore { // dynamic content
				Divider()
				Text(content.body)
				Divider()
				LabeledContent("Name") {
					Text((content.userInfo["movie"] as! [String: AnyHashable])["name"] as! String)
				}
				LabeledContent("Published") {
					Text(Date(timeIntervalSince1970:(content.userInfo["movie"] as! [String: AnyHashable])["published"] as! Double), format: .dateTime)
				}

			}
			Spacer()
			Toggle("Show details", isOn: $showMore) // interaction of the the user possible
		}
	}
}
Testing
To test your view within the simulator you can drag and drop a custom .apns payload right onto the simulator view. Here is a sample file I used for this article.
⚠️ Be aware to change "Simulator Target Bundle" the bundle id of your watch app.
{
  "aps": {
    "alert": {
      "body": "We have added movie XYZ to your watch list. Get ready for a movie night !",
      "title": "New Movie",
      "subtitle": "Added to your watch list"
    },
    "category": "notification_category"
  },
  "movie": {
    "id": "1234",
    "name": "XYZ",
    "published": 1579937802
  },
  "Simulator Target Bundle": "com.test.testapp.watchkitapp"
}
By dragging the file into the running simulator window you should see the following result:
Summary
Customizing the long look interface gives your application a nice touch and demonstrate an eye to details. Its a nice technique to make your app even more unique to the user and provides opportunities to enrich the notification experience.
I hope you learned something new today and I hope to see you next time !