It was around September last year when I first heard about maestro and mobile.dev. maestro is a CLI tool which lets you easily write E2E UI tests for your mobile applications. It is using .yaml files to describe flows, which makes it even possible for non-developers to write these tests. Whats even better is, that maestro already accounts for flakiness and loading times. It has built-in timers which wait for content to be properly loaded to continue. This is awesome, since I always remember to write timeouts in my UI tests to wait for something to be loaded.
maestro supports major mobile platforms are supported: iOS, Android, ReactNative, Flutter.
In this small post I want to give an introduction how it can be used to write E2E UI tests for an iOS application. As an example for some parts of this article, I will use my current side project "Glance". The app can be used to show analytics data for webpages being tracked with Plausible.io. If you want, you can check out the app on TestFlight.
Installation
For installation I would recommend to follow official installation instructions here. I personally used homebrew to install it.
brew install maestro

# idb is needed for maestro to work correctly on iOS
brew tap facebook/fb
brew install facebook/fb/idb-companion
This is all what you would need. There is no need to add any additional SDK to your source code. The project files can just stay untouched, maestro is only installed on the machine where the tests need to run.
Flow Files
Lets first have a look at the flow files, maestro uses. A flow file is a valid .yaml file. It always starts with your app id. This is used to identify the app to test. Next, the different instructions to automate the UI flows are written down. You can find all of the supported instructions on the documentation page.
appId: com.test.app
---
- launchApp
- tapOn: 'Text'
- stopApp
Nesting
A very neat feature of flow files is, that you can nest them. This comes in handy, e.g. when you always need to login at the beginning of your flow. You can then modularise and divide the flow into a LoginFlow and a TestFlow file.
appId: com.test.app
---
- launchApp
- tapOn: 'Login'appId: com.test.app
---
- runFlow: 'LoginFlow.yaml'
- tapOn: 'My Button Text'Maestro Studio
You may now wonder how you would come up with the instructions to add to your flows. One option, as described above is to look at the official documentation the other option is to use execute maestro studio. This will launch a locally hosted web server which lets you directly interact with the iOS simulator. With version 1.20.0 this feature got even more powerful. You can use to let maestro automatically record your interactions with the app.
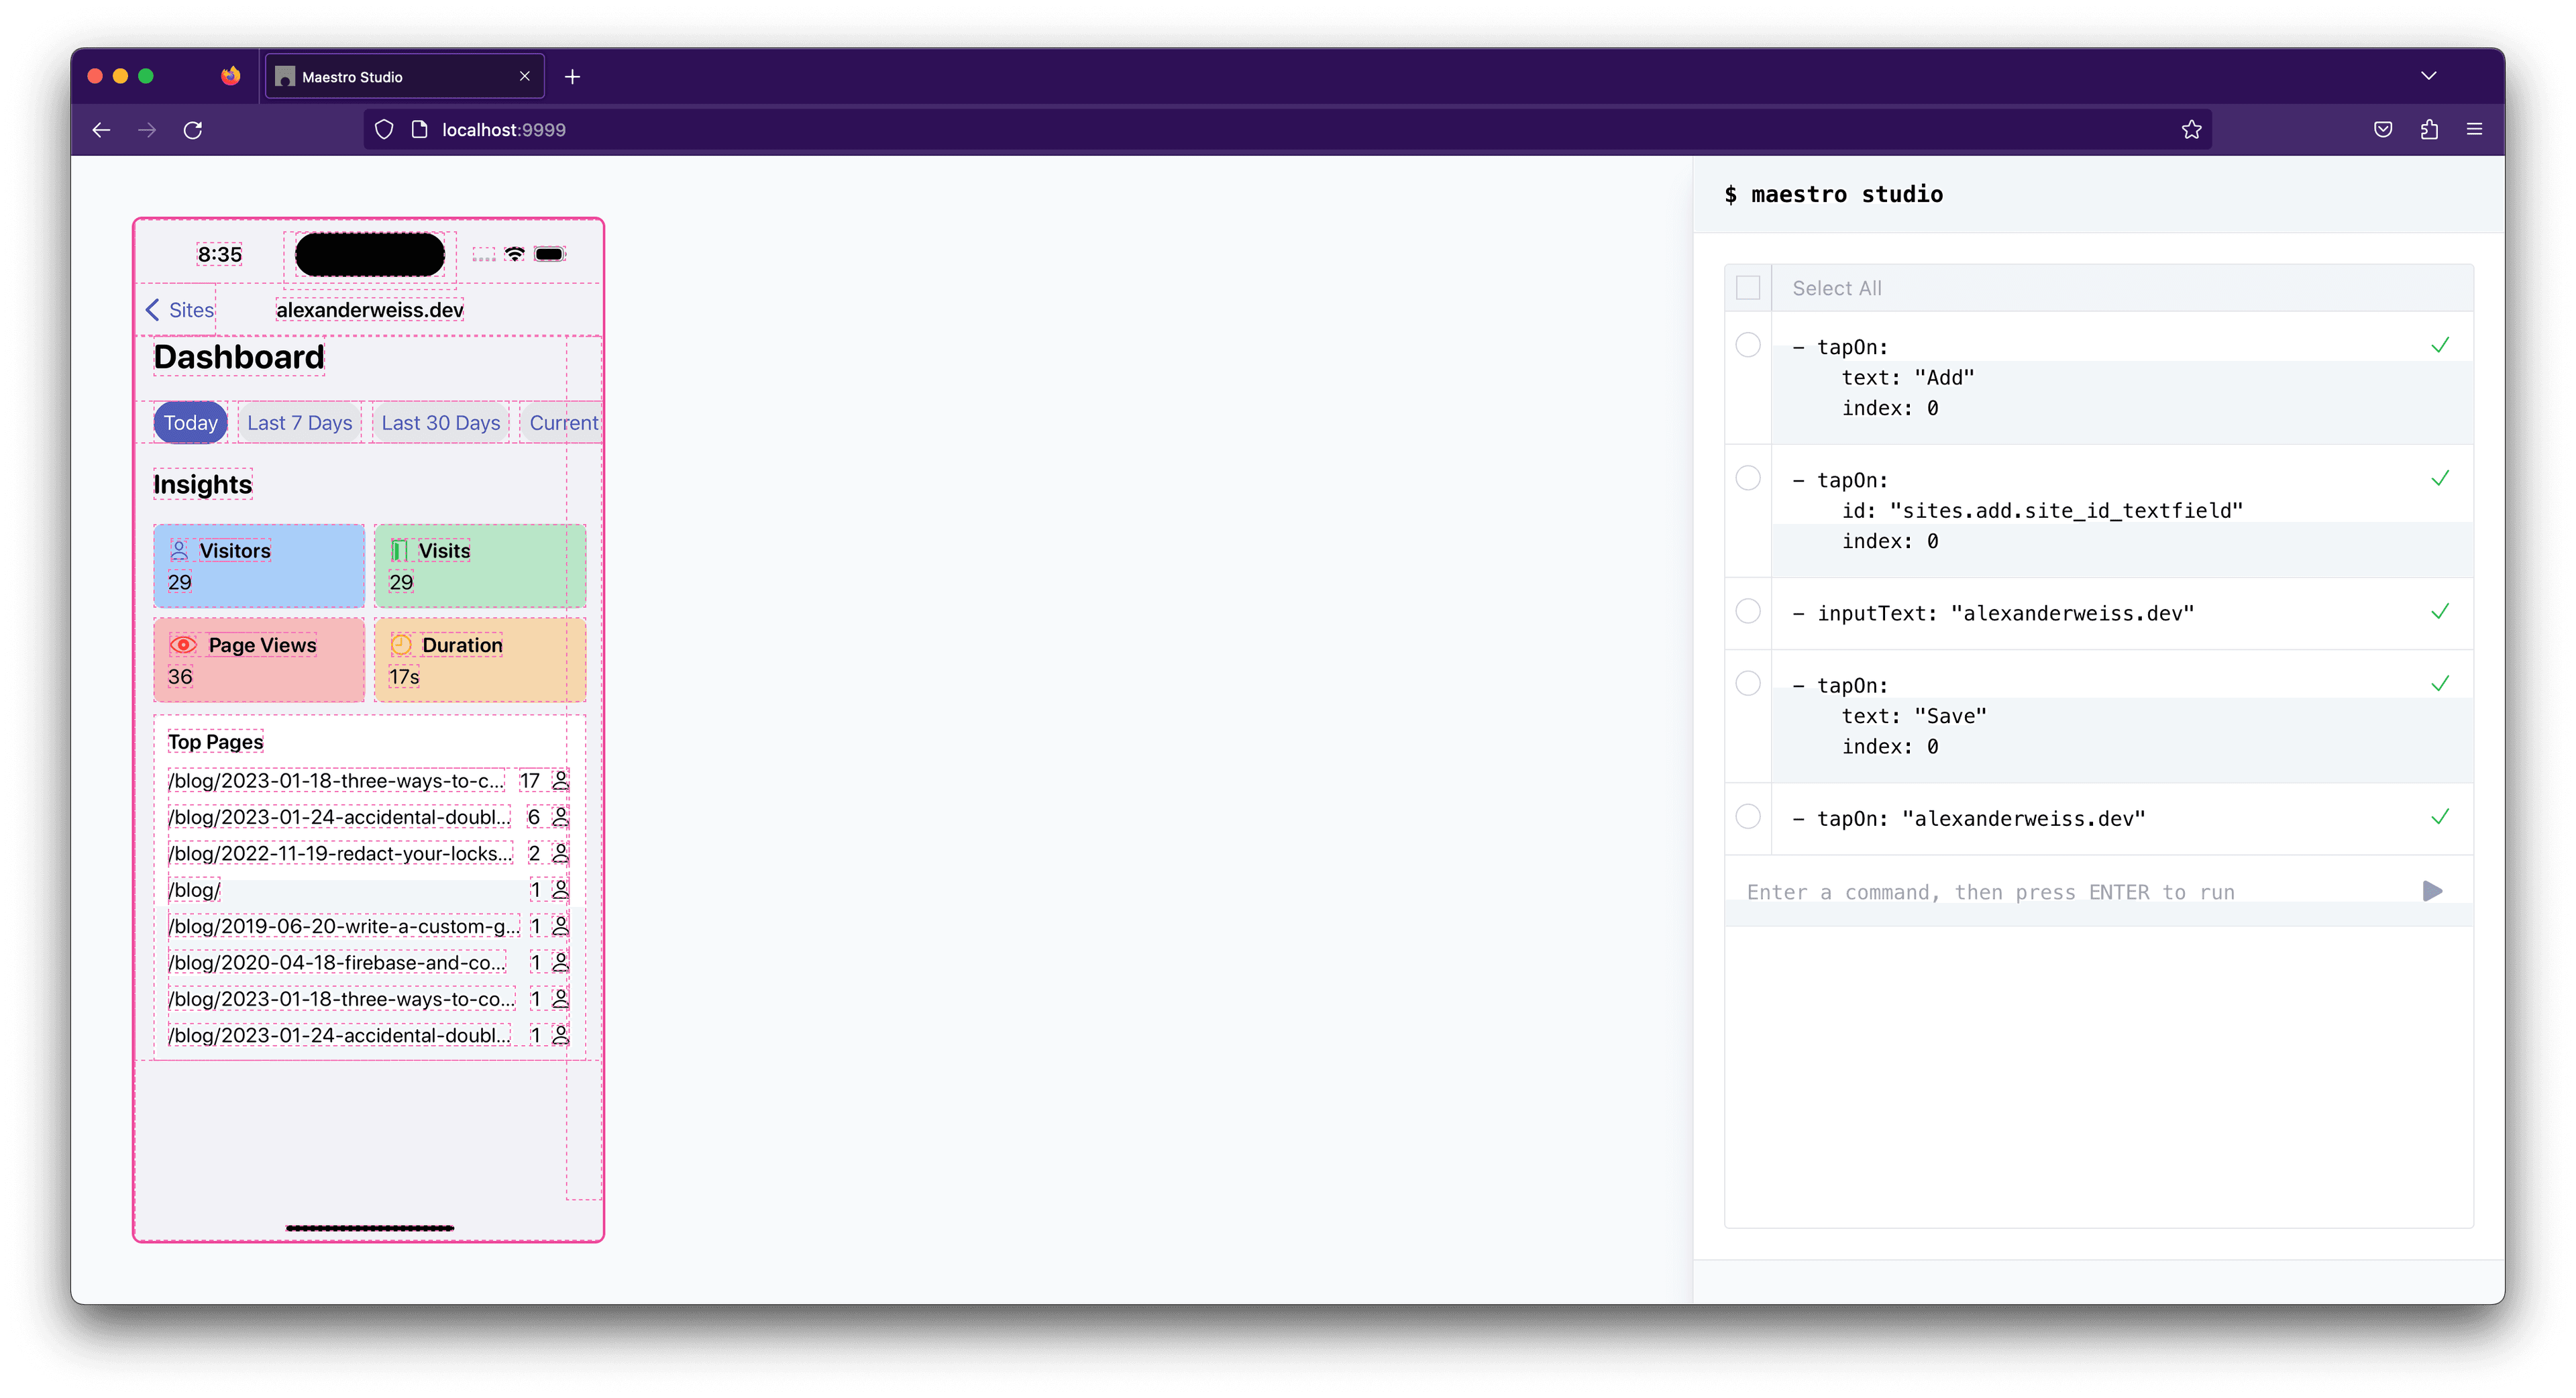
Once your app is launched on the simulator, refresh the view on the top right, and you are presented with an image of your app as well as all interactive elements. You can then easily select one and maestro will interact with the simulator. Every action you take will be recorded and can be exported as a flow file.
So in the end it becomes very easy to create end-to-end flow files, simply by tapping through your app.
Example
Reading is the one thing, but trying out the stuff is the other thing. So after covering the basics I want to give a real world example how to write a flow. The flow I want to implement is adding a new site to be shown in Glance. What a user would need to do is:
- Open the main screen of the app
- Tap on the plus icon at the top right
- Select the Plausible server where the site is located
- Enter the site ID
- Tap on Save
- Verify the site is added to the site list
- Tap on the site to load the site details
- Stop the app
Now we have a written description of the steps needed to be executed by our flow. Let us now convert this into a flow file.
appId: dev.alexanderweiss.Glance
---
- launchApp:
    appId: 'dev.alexanderweiss.Glance'
    clearState: true
    clearKeychain: false # optional: clear *entire* iOS keychain
    stopApp: true # optional (true by default): stop the app before launching it
- tapOn: 'Add'
- tapOn:
    id: 'sites.add.site_id_textfield'
    index: 0
- inputText: 'alexanderweiss.dev'
- tapOn: 'Save'
- tapOn: 'alexanderweiss.dev'
- assertVisible: 'Dashboard'
- assertVisible: 'alexanderweiss.dev'
- stopApp
This is how the execution looks like:
The whole flow to come up with took around 10 minutes for me. I would say this is pretty impressive compared to how long it takes for me doing such tests UI with XCTest.
Conclusion
I am really impressed how easy it is to create E2E UI test flows with maestro. Just simple instructions with a powerful tooling behind. There is much more to discover in maestro and I definitely recommend to check out their documentation. I am really excited to see what they introduce next.
I hope this small post gave you an introduction into maestro and maybe motivated you to check it out.
See you next time ! 👋